

How To Repair Hard Wood Floor Cupping Cause By Heat
Hardwood floors are known for being durable and resilient, but they have one big weakness: h2o.
Forest floor can stand up to years of heavy use, just a piffling water over fourth dimension tin can ruin the beautiful hardwood.
Perhaps you moved into a business firm with a damaged woods floor or maybe you have had a flood from the kitchen or bathroom plumbing. If yous are noticing stained or warped woods or big gaps between boards, you have water damage.
There are some ways that you lot can repair h2o harm you find on your hardwood floors, but sometimes you lot will need to supervene upon the floor altogether.
This guide will help you identify the type of damage, discover out how to repair water-damaged hardwood floors, and teach you how to prevent futurity water harm.
How Can I Tell If I Have Water Impairment on My Hardwood Floor?
If you recently had a small flood or water leak, y'all probably know that your wood floor has some water damage.
But if you're non certain, yous can audit the flooring visually for some of the signs of water-damaged flooring.
Woods Floor Staining
Water stains on a woods floor take the shape of an uneven ring that ripples beyond the wood from the water source. The stains can exist either light or dark. Stains with a white outline are easier to repair at home than darker stains, which bespeak a complete soaking of the hardwood flooring.
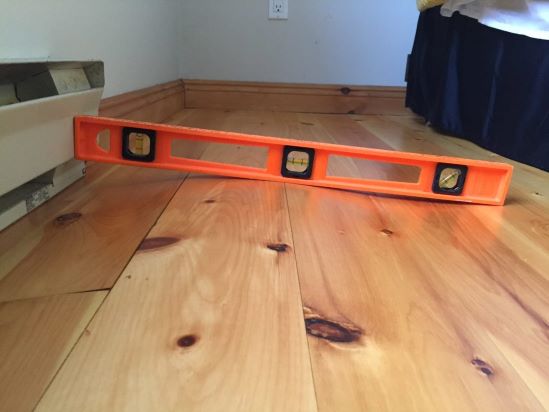
Wood Flooring Cupping
Cupping is one of the ways that hardwood flooring can warp out of shape when wet. You tin can identify cupping on your hardwood floor when the edges of the private boards bend upward and are no longer even with the center part of the boards. It gets its name from the loving cup or basin shape each plank takes when the edges rise up. Cupping tin also make the gaps between floorboards expand, leaving uncomfortable cracks.
If you want to learn what to exercise about cupping on your hardwood flooring, check out our article on cupping in hardwood floors.
Forest Floor Crowning
Crowning occurs in a similar way to cupping, except the boards warp the opposite way. Crowning floorboards ascent up in the eye, creating a bowed or bumpy appearance on each private board. This is due to the flooring pieces expanding and pressing into each other too much. Once the floor dries, it may leave big gaps between pieces.
Wood Flooring Buckling

Buckling is the most farthermost blazon of hardwood h2o damage. This is when the floor planks are pushed then tightly together that they actually disassemble from the subfloor. The extreme moisture in the forest causes each floorboard to expand. This tin can make a large hump in the flooring or intermission the locking natural language-and-groove systems between boards.
Buckling is most likely if your hardwood flooring was installed poorly to brainstorm with or in an extreme flood (such as gallons of water pouring in from a hurricane or a burst pipe).
If yous doubtable your water damage is so bad that the hardwood flooring is buckling, cheque out our article specifically on buckling wood flooring.
Should You Ready or Replace Water-Damaged Forest Floors?
One time y'all have water damage on your forest floor, you lot might wonder if you can get abroad with fixing the floor instead of paying to replace it. This is especially tempting if your water damage is only a pocket-sized area of the room.
Information technology may not be safe to live with a water-damaged flooring if information technology was wet enough for mold and other bacteria to grow.
In cases of severe floods or a leak of tainted water (similar sewer water), you probably need to replace the whole floor to be safe. These molds or bacteria can be extremely dangerous to alive with. Plus, severe leaks can weaken the subfloor and other structural pieces of your home.
If you are concerned that your wood floor may be growing mold, read our commodity about how to remove mold on a hardwood flooring.
If your water damage came from clean water and you are able to dry the floor out completely, you tin can think nigh fixing the floor instead.
The problem with fixing hardwood floors is that it tin be difficult to match the finish on a repaired section with the original finish.
If the water harm is in an out-of-the-way place or if you can throw a rug over it to hibernate the difference, repairing it may be a good selection. Or, if the hardwood is merely in one room of your firm, you may be able to refinish the entire floor so it comes out an even color.
Your choice will depend on prophylactic and whether yous want to live with a repaired area that may look unlike than the rest of the flooring.
You might consider replacing a department of the hardwood floor with a cheaper and more than durable cloth, similar ceramic tile. This is particularly common in front of an entry door. You can remove the damaged section of hardwood and install tiles with a smashing transition rather than having a department of hardwood that was obviously repaired.
Identifying the Source of the Water
If y'all notice h2o damage on your hardwood floor that wasn't there before, you lot need to be sure where the water came from. The source of the water makes a big difference in the decision of whether you should fix or supercede your floors because some water sources may carry harmful bacteria.
What to Practice When You lot Can't Observe The Leak
Sometimes the source of h2o harm is non obvious. You will desire to fix bug before you fix the hardwood floor then that y'all don't have the same damage again on your newly repaired floor.
You lot tin ordinarily narrow water harm in a home down to two categories: external water sources and internal h2o sources.
External h2o sources dampen your dwelling through the walls, roof, or foundation. Common external sources include:
- Overwhelming amounts of water from a storm or overflowing
- Overwatering a yard
- Doors and windows with leaky seals, or that are left open
- A leaking roof
- A cracked foundation or inadequate or broken drainage system (sump pump)
Internal h2o sources come from inside the house. Some common leaks include:
- Broken plumbing seals, such as radiator pipes or drains nether a sink
- Leaking pipes inside a wall or flooring (especially if the pipes have frozen)
- Declining hot water heaters
- Soft hoses such as the water supply on a refrigerator or dishwasher (these oftentimes get pinched when moving appliances and should exist replaced every few years)
- Overflow from a sink or shower
- A spilled mop bucket or mopping with as well much water
These examples tin probably help yous find the source of the leak so it can exist repaired. If you withal have no idea where your water damage is coming from or you suspect information technology is coming from inside your walls, you probably need to call a plumber.
Is The H2o Fresh or Dingy?
The water that stained your floor should fit into ane of the post-obit 3 groups:
- Clean Water, such as rainwater from an open up window, overflow from a sink or tub, or a leaking hot h2o heater. This water is generally pure and will behave very few leaner. Unless the area was moisture for several days (enough for mold to grow), this kind of water harm is probably non dangerous.
- Used or "Greyness" Water, such as that from a drainpipe under a sink or shower, has been exposed to some dirt and other waste. If this kind of harm doesn't dry apace, information technology will abound bacteria and mold.
- Dirty or "Black" Water is tainted water or sewage. This is from a leaking, overflowing, or backed-upwardly septic line. This h2o is full of dangerous bacteria. Yous can endeavour to sanitize the wood if it is but a pocket-size leak (1 or 2 liters), but near of the time a blackness water leak will require replacing the floor. Yous should clothing gloves and a filtering mask when you lot clean whatsoever area damaged by black water.
Identifying the source of the water damage volition help yous decide whether information technology's condom to repair the floor. Of course, this is also the time to right the bug that allowed water to go onto your floor such every bit by replacing window seals or calling a plumber to fix a pipe.
How to Fix Water-Damaged Woods Flooring
Depending on how much of the flooring was affected past water damage, you might demand to call a professional person to repair your water-damaged wood floors. They will be more than experienced in sanding and staining the floor evenly. It can be a hard process, simply if y'all are confident in your DIY abilities, you should exist able to pull information technology off.
After you get the floor completely dry and knock down the warped and water-damaged areas, the process is mostly the same as refinishing a worn-out floor. Feel free to read our other articles on that process, but nosotros will include the steps here.
Pace 1: Dry the Floor if it is Even so Wet
If your water impairment is new, you will need to dry out the boards off earlier you tin can actually assess the damage or make any repairs.
Continuing water on the surface can exist sucked up with a shop vacuum on moisture fashion. A squeegee can help push the water toward the vacuum hose.
Then the wood needs time to dry out internally. You lot can speed this procedure upwardly past using fans and open up windows to ventilate the room. Yous tin also hire or buy a dehumidifier automobile.
Be careful not to dry the flooring likewise fast. Applying estrus to a wet floor, for instance, can lead to more cupping or crowning. Hardwood needs to adjust gradually to temperature and humidity changes, and so stick to natural airflow methods to dry out the wood.
Pace 2: Check for Actress Floorboards in Storage and Install Them
Ordinarily, flooring installers will leave a few leftover pieces of wood at the house when they put in a flooring. If the flooring in your house is decades onetime, you lot probably won't accept this luxury, simply it doesn't injure to expect.
A few pieces of flooring may be plenty for a flooring installer to remove the damaged boards and replace them with new ones that will match perfectly. This is potentially the easiest way to repair your h2o-damaged floor, so wait around.
Removing the onetime boards and laying new ones requires experience and the right tools. This is particularly truthful if the wood floor is glued or nailed down. Y'all most likely need a flooring skillful to come to your house and supersede the boards.
If the lucifer on the finish is shut afterwards y'all install the new boards, this may be all you need to exercise. If the color departure is actually bad, you lot will desire to proceed to the refinishing process.
Annotation that buffing and refinishing the floor will not just be more difficult, just more expensive. You will have to get the tools and supplies to refinish the flooring.
Step 3: Sand the Floor
Afterward you place new planks where the damaged ones were, or if you do not have whatsoever planks to weave into the floor, y'all are going to demand to sand the flooring.
The right sander for the job is one that is specifically made for flooring. These have a big sanding wheel and a heavy caput so that you can sand big areas speedily and evenly. You will probably demand to hire it from a hardware store or flooring company.
Utilise a coarse grit sanding wheel start (around 60-fourscore grit) and follow with a fine sander (100-150 grit or a fine sanding screen).
You should sand the edges of the room by hand because it can be hard to maneuver the flooring sander into the edges and impossible to reach the corners. Employ a fine sandpaper betwixt 100 and 150 grit. Sand with the woodgrain.
If at all possible, you should sand the unabridged surface for the hardwood floor, or at least the unabridged room with h2o damage.
Move the sander across the unabridged surface of the floor, overlapping a few inches on each stroke. If you do not get the water-damaged sections apartment on the showtime laissez passer, y'all can endeavour a 2d pass.
Practice not sand the floor too many times unless you are sure that your planks are very thick. Taking too much thickness off the floor will cause problems.
Note: Wearable a mask or respirator when using a flooring scuff sander. These machines will kick upwards a lot of dust as they sand the finish and wood.
Stride four: Make clean the Sanded Hardwood Flooring
Use a vacuum to remove all of the sawdust you lot created by sanding the floor. Follow the vacuuming up with a dry microfiber cloth or dust mop. This will get the fine dust off of the floor.
This process will also remove other dirt and make the stain adhere better to the wood.
It's expert to do this non merely subsequently the sanding is complete, but every five minutes while you sand.
You can too vacuum the sander bike to remove the dust. If it clogs up too much, it won't sand evenly.
Step five: Stain the Sanded Wood Flooring
Following the directions on the tin can, apply the desired color of stain to the hardwood floor. Try to select a stain that is specifically made for hardwood floors.
Note that almost woods stains will put off some strong fumes. You lot demand to wearable a respirator if possible, or at least ventilate the room by opening windows and using fans (non directly as they will dry out your stain too fast and blow dust effectually).
Start by applying a thin, fifty-fifty coat of stain to a small area (less than 1 square meter). Brush the edges and corners commencement to brand certain you don't miss them. Use a make clean rag to wipe upwardly all the backlog wood stain.
You will take permanent lines in the finished coat if you allow the leading edge of your stain dry. Endeavor to work quickly and don't leave any edge to dry for more than than 10 or xv minutes. Apply the stain evenly across the whole room.
Note: Make sure to accept an exit strategy when you showtime staining. Y'all don't want to pace beyond a wet stain to get out of a corner. Work from the deepest corners of the room toward the door.
Footstep vi: Employ Polyurethane
A coat of polyurethane on top of the stain will protect the floor from scuffs and create a h2o-resistant barrier.
Yous can gyre polyurethane onto the flooring similar pigment afterwards the stain is completely dry.
The fundamental to applying polyurethane is that you need a very thin, even coat to create a nice-looking cease. Choosing the right roller will aid.
Don't use a regular fuzzy pigment roller or you volition leave a coat that's way too thick. Use a dense foam roller for a smooth finish. Also, employ a long handle for the roller then you tin encounter better while you work.
Cut in the edges of the room with a good quality paintbrush first and then use the roller to complete the center of the room.
Requite the refinished floor a day to dry earlier moving furniture dorsum into it and you will take a fully improved hardwood floor!
Preventing Water Damage to Your Hardwood Flooring
Information technology'south always easier and cheaper to take care of problems before they go issues. Have intendance to avert woods floor water damage in the first place.
Here are some ideas to prevent h2o impairment to your hardwood flooring:
- Continue doors and windows closed when you lot are away from home and repair small leaks as soon as you notice them.
- Hire only licensed contractors to work on your plumbing.
- Be particularly careful of safe or plastic hoses on washing machines, dishwashers, and refrigerators tha.t tin can break over time.
- Invest in shower curtains, shoe mats, and other items to keep daily water off your flooring.
- When you make clean your floor, do not bring a big saucepan of mop water where it tin can spill on your hardwood floor and mop only with a modest corporeality of water.
- Make clean upwardly all spills immediately.
- Keep your business firm warm plenty to avoid freezing temperatures that tin can outburst a pipe.

Source: https://flooring-experts.com/how-to-repair-water-damaged-hardwood-floors/
Posted by: guidrysaidence.blogspot.com
0 Response to "How To Repair Hard Wood Floor Cupping Cause By Heat"
Post a Comment